You can put stickers on almost anything; laptops, picture frames, mirrors, binders, notebooks, and more. Want to know what to do with stickers besides putting them on things. Here we’ll be showing you a few more sticker ideas, like putting them in a scrapbook, and did you know you can even create a hair accessory. As a result today we’ll be telling you all about what to do with stickers.
More important than convenience, stickers have become popular because they serve as a low-risk way of initiating a conversation with a new friend or acquaintance. If you’re naturally socially awkward, stickers can also help to reduce social friction where you can create a bond with another fellow collector.
Like with anything, you may put a sticker somewhere you regret or your sticker may be worn out, so what do you do in these cases? You’ll be glad to know that there is the possibility you won’t have to get rid of your favorite sticker, at all. Before you decide to throw away your sticker; consider possible reuse around your house. Below you’ll find different ideas about what to do with stickers.
What to do with Stickers FAQs
What to put stickers on to reuse?
Obviously, you’re going to need a paper on which you can place stickers and remove them while maintaining their stickiness and without ripping them. Some options are release paper, silicone-coated paper, or wax-coated paper.
How do you salvage a sticker?
Using the heat from a hairdryer or a heat gun can be used to remove labels and other stickers from any surface. Heat up the adhesive until it will be soft again. Then you will be able to slowly peel the sticker off. Avoid using extreme heat on certain surfaces.
How do you make a sticker sticky again?
Use a hairdryer and a sponge that is slightly damp and slowly blow the heat under the sticker while applying moisture to its surface. Lift the sticker from the wall. Once the sticker is dry, use spray adhesive or a glue stick to reapply the adhesive.
Should I put stickers on my laptop?
Stickers should be placed on the top “clamshell” or the back end of the laptop. Sticking stickers in these locations ensures that they adhere effectively. Furthermore, they are prevented from blocking the screen, keyboard, and other critical features such as outlets and buttons.
Should I put a sticker on my laptop camera?
Yes, you can. Many opt to put stickers on laptop cameras because when a computer camera is covered a hacker can’t see what the camera views. Of course, this doesn’t mean your equipment is safe from being hacked. Uninvited listening can be prevented by covering a laptop’s mic, thus making it difficult for a hacker to hear.
Where do you put vinyl stickers?
The main surfaces include wood, plastic, glass, and metal. Position it on your computer, on your car, on your wall, or on your window. As long as the surface is flat, vinyl stickers will probably stick to it.
Can laptop stickers be removed and reused?
Yeah, you can! You can! You may want to rethink whether it is a seal for assurance, a license key, or a serial number sticker because missing these will make it difficult in some instances to manage the laptop or its bundled software.
What glue is used on stickers?
Rubber adhesives are known for their high tac and will adhere to such surfaces as Teflon, silicone, plastics, and even other rubber itself. Acrylic is a permanent type of adhesive that comes in two sub-types: Pressure-sensitive– Which offers low to high tac and can withstand temperatures up to 200F.
Storing Stickers
- The Pocket Folder: You know those storage folders you can find for one dollar in the Target dollar spot or at the dollar store? Sometimes referred to as “coupon organizers?” For a beginning or someone who doesn’t have tons of stickers, this might be the perfect solution.
- The Photo Album: There are a lot of convenient features to using a mini photo album, it is well suited for someone with a smaller sticker collection. They can be found at the dollar store and everyone loves a dollar deal.
- The Mini Binder: These feature cute prints and who can resist anything mini? This method can help you relieve most of the clump of pocket folders, in the case you have a hefty collection.
- The Cardstock Method: This method has become really popular in the Facebook sticker world. This method works really well for those who have a large sticker collection that they are constantly adding to.
Removing Stickers
Nail or Sharp Blade
You may easily use your nails to remove them if the sticker is not too old. To do this, you must find out which side of the sticker will easily fall out so you can begin on that side. Rub your nail smoothly on the loosened tip, to ensure the stickers, don’t break apart in the center.
You can follow the same steps using a sharp blade being careful enough not to cause any scratches on the surface you are working on. You must be patient enough to operate smoothly and steadily to get a clear, sticker-free, and scratch-free surface.
Oil Based Substances
Mineral oil, tea tree oil, olive oil, petroleum jelly, lotion, and other similar substances can moisture the stock, help loosen and easily peel or scratch off adhesives.
Damp Cloth
Rub the wet cloth on the back of the sticker, you can easily remove the sticker from the surface after a few minutes.
Solvents
The adhesives can be disbanded by substances like lighter fluids, mineral spirits, the WD-40, and Goo Gone. Solvents like acetone, rubbing alcohol Windex, and vinegar will also loosen the sticker efficiently.
What to do with Stickers Ideas
Card Writing
One of the favorite and most popular ways to use stickers is in cards. We’ve always loved to decorate cards and letters we send out with lots of stickers. Something about using it for others than ourselves makes it more worth it.
Envelope Decoration
Decorating envelopes with stickers and washi tapes is a separate task from the cards. Receiving a piece of mail with a cutely decorated envelope will sure make both the sender and receiver happy.
Covering up Mistakes
Another way we use stickers is to cover up the mistake we made while writing cards. Because using whiteout can sometimes ruin the cuteness of the card, we just put a sticker with a solid background on the mistake to make it look cute. This way you can act as if nothing happened.
Journal/Planner/Album Sticker
You can use cute stickers in your goal-setting planner (Powersheets!) or any other kind of planner you have, to mark important dates and add a bit of encouragement for yourself.
SUNNYHILL Sticker Collecting Album
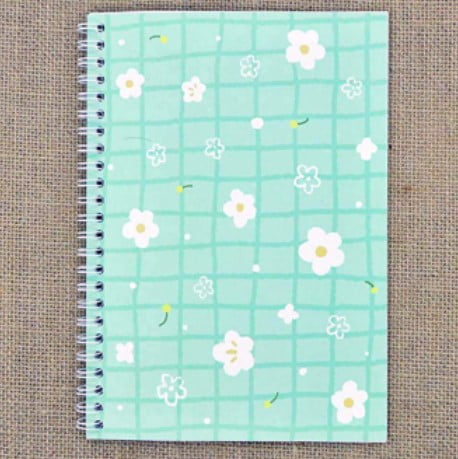
These sticker collecting albums are special because stickers can be peeled and stored in them, and later taken back out and will still be sticky.
The reusable stickers book size is 8.3″ x 5.8″. or 21 x 14.8 cm; beautifully patterned cardboard cover, white metal coil bound into a book.
Flexible vinyl laminated washable covers lay flat when open. Each album has 30 pages, each usable on both sides.
It is also an exquisite and perfect gift, suitable for everyone who likes to collect stickers.
Features:
- Reusable
- 30 Sheets
- Vinyl, Plastic
Erin Condren Designer Sticker Album
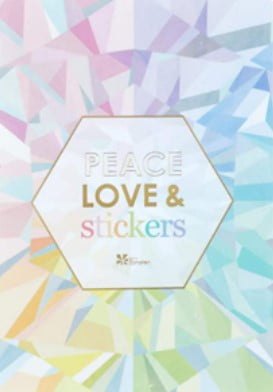
This 24-page sticker album features an Erin Condren designer Kaleidoscope design theme. It is a stylish album to keep all of your favorite stickers. Stickers are sold separately.
This designer album can store, protect and carry up to 48 sticker sheets. This is an absolute must for any sticker collector.
The album features a protective plastic cover to keep all of your precious stickers in pristine condition. You can carry your stickers on the go. Take this with you so you are prepared for any sticky situation.
Features:
- Durable
- Stylish
- Portable
Use them on Laptops
Laptop stickers! This is something every sticker fan has tried. Waterproof stickers are especially good for this. They are just so cute and the size is perfect for laptops, back of the phone, water bottles, and truly anywhere you want.
Since they are waterproof and are more sturdy, you don’t have to worry about them peeling off.
Instax Photos Deco
You can decorate your Instax pictures with stickers to mark the occasion. Fujifilm Instax cameras are so popular. To decorate those cute instant photos, you can put stickers and washi tape on them and add some character to the pictures. You can use birthday-themed stickers to help remember when the pictures were taken.
Make a Sticker Book
Reusable sticker books come with pages that allow you to stick and later peel off stickers with the adhesive still intact.
Magnetic Sheets with Adhesive Backing
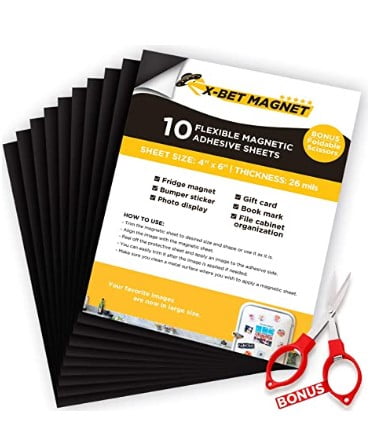
Magnetic sheets are made with premium quality material with Long Lasting Adhesive Magnet! Practical magnetic roll sheet. Peel magnet sheets can be cut to any size, for any project easily with scissors.
It has strong, durable, and flexible adhesive magnetic strips. Sticks great on any metal surface.
Magnetic sheets with adhesive backing are ideal for creative kid projects, decoration fridge magnets, photo magnets, magnetic photo frames, chalkboards, whiteboards, dry erase boards, magnetic pages, cuttable picture magnets, magnetic picture clips, wall magnetic paper, refrigerator magnets, car magnetic sticker, bumper sticker, adhesive magnets, magnetic squares, etc.
Features:
- Durable
- Flexible
- Strong
DIY Hair Barrette
Personalizing something is a way to make it uniquely yours, and stand out from the crowd. You can make your own name barrette using a classic tortoiseshell clip, rhinestone, pearl stickers, and scissors. Using the same basic idea you can also personalize clothing and other personal objects like your favorite bag or luggage.
To make your personalized barrette choose a hair clip that will fit the stickers you want to use.
Start in the middle of the hair clip with the middle letter of the name you want to spell to ensure the name is centered on the barrette.
For example, if your name is “Marie,” start with the “R”, then the “A”, then the “M”, then go right with the “I” then the “E”. If you can’t find the letters you want in the color you desire, you can use strips of single row rhinestones and cut them to create letter shapes.

